| win10下vscode+mingw64使用第三方winpcap库文件的环境配置 | 您所在的位置:网站首页 › mingw 使用多媒体库 › win10下vscode+mingw64使用第三方winpcap库文件的环境配置 |
win10下vscode+mingw64使用第三方winpcap库文件的环境配置
|
前言
因为不想在电脑上安装各种IDE,所以一直是在win10下用vscode写C/C++的程序,但是以往基本都是小型C/C++项目,即使是多文件编程都是直接 include xxx.cpp 投机来搞得,所以就没怎么关心win10下的多文件编程以及第三方库文件的使用。现在因课程需要不得不使用第三方的库文件 网络数据包捕获函数包 来编一些程序,虽然可以使用linux来搞,但还是想了解一下win下的环境配置。 步骤 首先要保证vscode和mingw64环境已经配置好,具体方法网上都有,此外要保证vscode可以正常编写cpp代码并编译运行 winpcap下载安装 去winpcap的官网下载Developer’s Packs 注意一定是开发包,,不是那个源码QAQ,,然后解压,里面有一个 Include 和 Lib 文件夹网上的一些方法是将这两个文件夹复制到对应的mingw64的对应目录中,我没选择这种做法,一来是不想改变mingw64原本的内容,不然这样时间一长,自己就忘记了之前添加过什么东西,二来是这样做我一直提示 fatal error: pcap.h: No such file or directory #include这里我选择不将其复制到mingw中的方法: 配置vscode 对于多文件编程,可以通过编写 makefile 来实现对项目文件的管理,同时自定义出编译参数,在vscode里有一个类似的方式,就是 tast.json ,它也可以实现一定程度上的编译指令的自动化在项目的 ~/.vscode/task.json 中填写如下json: { "tasks": [ { "type": "shell", "label": "build", // "command": "D:\\mingw64\\bin\\gcc.exe", "command": "D:\\mingw64\\bin\\g++.exe", "args": [ "-g", // "'-std=c++17'", "-LG:\\xxxxxx\\WpdPack_4_1_2\\WpdPack\\Lib\\x64", "-IG:\\xxxxxx\\WpdPack_4_1_2\\WpdPack\\Include", "-finput-charset=UTF-8", "-fexec-charset=GBK", "${file}", "-o", "${fileDirname}\\${fileBasenameNoExtension}.exe", "-lwsock32", "-lwpcap" ], "options": { "cwd": "D:\\mingw64\\bin" }, "problemMatcher": [ "$gcc" ] } ], "version": "2.0.0" }其中 command 是你的mingw编译器的路径, args 中的 -Ixxx/include 将指示编译器包括第三方库文件的 include 中的文件; 同理 -Lxxx/lib 将包括第三方库文件的 .lib 文件;(其实你 gcc -v 里看到的 includepath 和 lib 的格式和这个是类似的) 此外对于 winpcap 还有增加 -lwpcap 编译指令 "-finput-charset=UTF-8", "-fexec-charset=GBK", 是为了保证中文编码的不乱码,貌似 mingw的输出默认是 utf-8,而一般win下的控制台是gbk的,所以会出现乱码,这是一种解决方法,或者可以代码中添加 system("chcp 65001") 来实现 还有一件事, pacp 中大量使用了已经被c++淘汰掉的 u_int 等等类似的关键字,所以 args 要么不加 -std=c++17 要么就自己在引入头文件前定义一下 #define u_int unsigned int 就行了,,或者直接写C。。 task.json 的 label 要与 launch.json 中的 preLaunchTask 一致。。 附一个我的 launch.json : { // 使用 IntelliSense 了解相关属性。 // 悬停以查看现有属性的描述。 // 欲了解更多信息,请访问: https://go.microsoft.com/fwlink/?linkid=830387 "version": "0.2.0", "configurations": [ { "name": "build and run", "type": "cppdbg", "request": "launch", "program": "${fileDirname}\\${fileBasenameNoExtension}.exe", "args": [], "stopAtEntry": false, "cwd": "${workspaceFolder}", "environment": [], "externalConsole": false, "MIMode": "gdb", "miDebuggerPath": "D:\\mingw64\\bin\\gdb.exe", "setupCommands": [ { "description": "Enable pretty-printing for gdb", "text": "-enable-pretty-printing", "ignoreFailures": true } ], "preLaunchTask": "build" } ] }如果要多文件编程,可以手动添加相关的文件到 args 里,有问题的化,网上也有很多的实现。。 此时解决了编译命令的问题,但是,vscode会提示我们 include的文件找不到,这时需要再在 ~.vscode/ 增加一个 c_cpp_properties.json 来配置 includePath 等属性,配置如下: { "configurations": [ { "name": "Win64", "includePath": [ "${workspaceRoot}", "D:\\mingw64\\lib\\gcc\\x86_64-w64-mingw32\\8.1.0\\include\\", "G:\\xxxxx\\WpdPack_4_1_2\\WpdPack\\Include\\" ], "defines": [ "_DEBUG", "UNICODE", "_UNICODE" ], "browse": { "path": [ "${workspaceRoot}", "D:\\mingw64\\lib\\gcc\\x86_64-w64-mingw32\\8.1.0\\include\\", "G:\\xxxxx\\WpdPack_4_1_2\\WpdPack\\Include\\" ], "limitSymbolsToIncludedHeaders": true }, "compilerPath": "D:\\mingw64\\bin\\g++.exe", "cStandard": "c11", "cppStandard": "c++17", "intelliSenseMode": "gcc-x64" } ], "version": 4 }在 includePath 和 path 中添加 winpcap的 include 的路径即可。。 这样可以通过对 task.json 的编写来管理项目文件的编译运行,不同的项目用到不同的第三方库文件就搞一个不同的 task.json 就行了(工作区),,不同去污染 mingw目录。。XD 测试一个 pcap 的测试程序: #include #include #include // #include // #include #define u_int unsigned int #define u_short unsigned short #define u_char unsigned char #define HAVE_REMOTE #include #include"remote-ext.h" // #pragma comment(lib,"wpcap.lib") // #include"winpcap/pcap.h" using namespace std; int main() { pcap_if_t *alldevs; pcap_if_t *d; int i = 0; char errbuf[PCAP_ERRBUF_SIZE]; /* 获取本地机器设备列表 */ if (pcap_findalldevs_ex(PCAP_SRC_IF_STRING, NULL /* auth is not needed */, &alldevs, errbuf) == -1) { fprintf(stderr, "Error in pcap_findalldevs_ex: %s\n", errbuf); exit(1); } /* 打印列表 */ for (d = alldevs; d != NULL; d = d->next) { printf("%d. %s", ++i, d->name); if (d->description) printf(" (%s)\n", d->description); else printf(" (No description available)\n"); } if (i == 0) { printf("\nNo interfaces found! Make sure WinPcap is installed.\n"); return 1; } /* 不再需要设备列表了,释放它 */ pcap_freealldevs(alldevs); return 0; } 不同于使用 Code Runner 插件来直接运行,使用 task.json 管理的项目需要 运行任务 的方式来编译项目,即 Ctrl+Shift+B 来执行任务,此时上方出现如下选项(这一步就是相当于使用 g++ main.cpp -o main.exe 编译命令,只是增加了一些链接文件的操作,,并用task来简化这一过程,,直接按快捷键不爽吗2333):
任务名即为 task文件里的 label 属性; 然后终端出现如下类似输出: 最后运行编译后的文件即可,类似输出:
可能这种方法对于不同的设备环境有不同的错误,所以可以评论提出来,或者网上寻找解决XD。。 参考:-L-I命令的使用 (end) |
 没有错误,即表明我们的 winpcap 配置是没有问题的,warning是因为cpp测试文件里使用了字符串指针数组,,无所谓可以忽略,
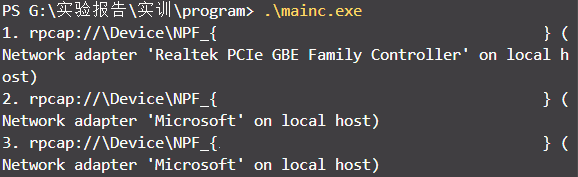
【本文地址】